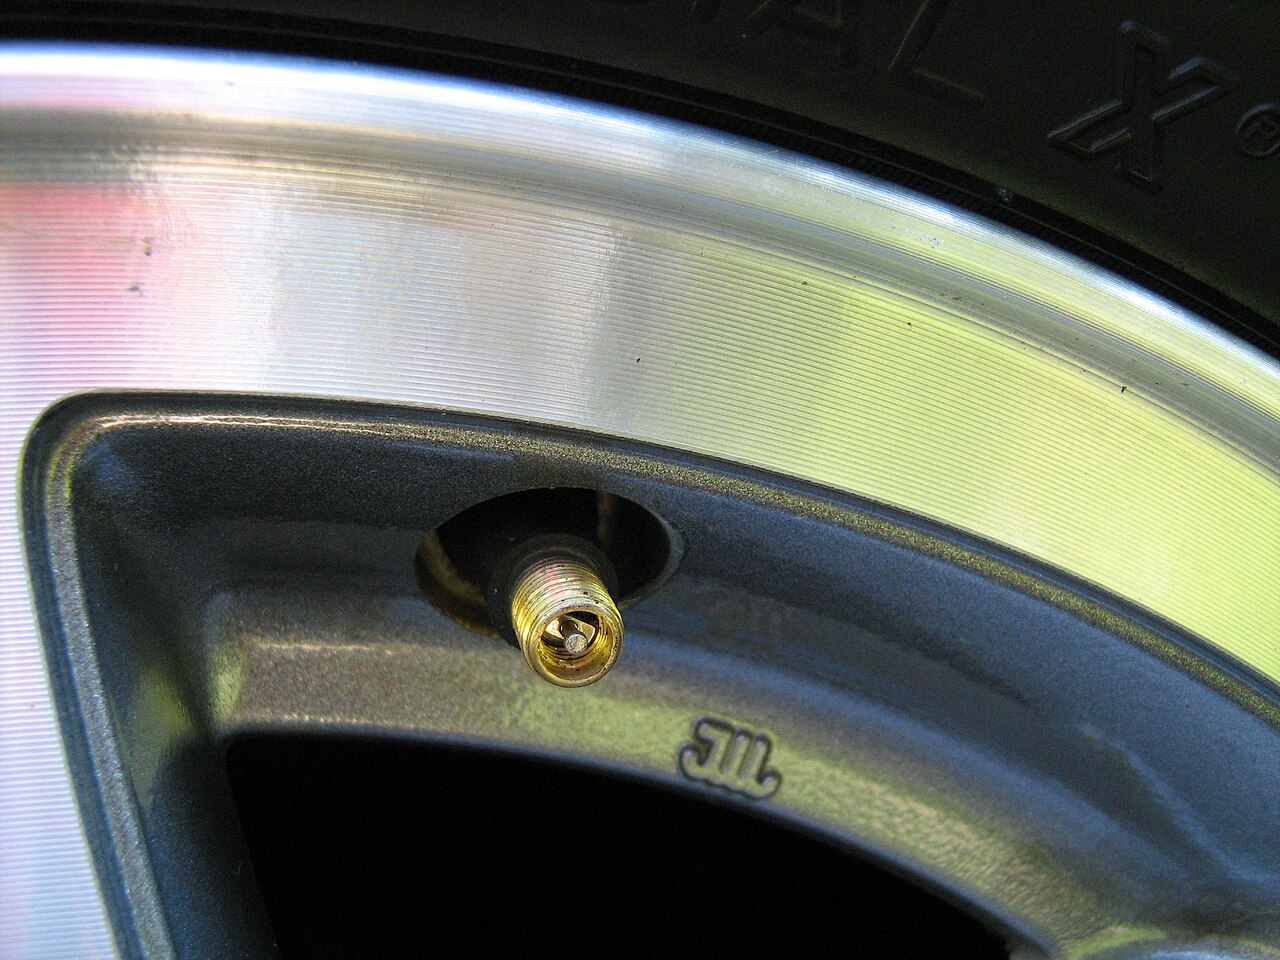
 It's 6:47 a.m. on a Tuesday, and you're rolling west on the Dolphin Expressway past the 826 interchange. The AC is blowing cold, the coffee is hot, and then that little horseshoe light with the exclamation point pops on in the dash. You pull onto the shoulder near NW 87th Avenue, the traffic roar dull behind you. You crouch down, peel the plastic cap off the driver's front valve stem, and press your thumb against the metal tip — a sharp hiss escapes, thin and fast, like air leaving a balloon pinched at the neck. That's not a nail. That's not a sidewall cut. That's the tiny brass check valve inside the stem, stuck open or worn out, bleeding pressure every mile you drive. You've got a valve core tool in the glove box because your buddy who works at the tire shop on Flagler told you to keep one. Thirty seconds, he said. You're about to find out if he's right.
A valve core is the tiny brass check valve inside your tire's valve stem that seals air in. When it fails, air leaks out — sometimes fast enough to notice overnight. You can replace it in about 30 seconds with a $3 valve core tool and a new core (about 50 cents). Unscrew the old core, screw in the new one, snug it just past finger-tight, and recheck pressure.
What Is a Valve Core and Why Does It Fail?
The valve core sits inside the valve stem — the metal tube sticking out of your wheel. Think of it like the little flap inside a soda bottle cap. When you press an air chuck onto the stem, the chuck pushes the core's pin down, opening a path for air to enter. When you pull the chuck off, a spring shoves the pin back up and a rubber seal presses against a brass seat, trapping air inside. That seal is a tiny rubber O-ring, maybe three millimeters across. Over time, heat, road salt, and the ozone in South Florida air dry that rubber out. It cracks. It flattens. A grain of sand gets caught in the seat. Suddenly the flap doesn't close all the way. Air slips past, molecule by molecule, and your tire drops pressure while you sleep. Most cores last three to five years. In Miami's heat and salt air, two years is more common. You'll notice it first on the tire that sits in the sun all day — the driver's side on a street-parked car, the spare mounted underneath a truck. The pressure loss is slow but steady — a little more each week. By the time the TPMS light triggers (usually at 25 percent below spec, so around 26 PSI on a 35 PSI tire), you've been driving underinflated for days. That means the sidewalls flex more than they should, heat builds up inside the rubber, and the tire's internal belts start to separate. A $150 tire gets ruined by a 50-cent part.How Do You Know It's the Core and Not Something Else?
Before you reach for the tool, confirm the leak is actually at the valve. Mix a little dish soap with water in a spray bottle — a teaspoon in a cup of water works fine. Spray it around the base of the valve stem where it meets the wheel, and spray the tip where the cap sits. Watch for bubbles. If bubbles form at the tip, the core is leaking. If they form at the base, the stem itself is cracked or the rim seal is bad — that's a shop job. If no bubbles appear anywhere, spray the tread and sidewall too. A nail head the size of a pencil eraser can hide in the grooves and leak slower than you'd expect. Here's the sensory test: press your thumb hard against the valve tip. A healthy core pushes back firm and clean. A bad one feels mushy, or you hear that thin hiss the moment you touch it. Sometimes you'll see a fine mist of moisture spray out — that's the air escaping fast enough to cool and condense. In January mornings when it's 58 degrees, that mist is visible. In August at 92 degrees, you'll only hear it.What Tools Do You Need?
Two things. A valve core tool — a little T-handle or screwdriver-looking thing with a slotted end that grips the core's flats. Costs $2 to $5 at any auto parts store. And a new core. Standard short cores (TR C1) fit almost every passenger car and light truck. They come in packs of four for about $2. Buy brass, not steel — steel cores seize in aluminum stems. If you drive a dually or a heavy trailer, you might need a long core (TR C2), but that's rare. Keep the tool and a spare core in your glove box. They weigh nothing. Optional but smart: a digital tire gauge. The pencil gauges at gas stations are often off by 3 to 5 PSI. A $12 digital gauge reads to 0.1 PSI and works in the dark. Check your pressure cold — first thing in the morning, before you drive a mile. Driving heats the air inside and adds 3 to 5 PSI temporarily. If you check hot, you'll underfill.Step-by-Step: The 30-Second Replacement
- Remove the valve cap. Set it somewhere it won't roll into a storm drain. A magnetic tray or your pocket works.
- Seat the tool on the core. Slide the slotted end over the core's two flats. You'll feel it click into the grooves. Hold the tool straight — angled force can snap the core's head off.
- Unscrew counterclockwise. One full turn usually breaks it free. Then spin it out fast. Air will rush out loud for a second — that's normal. Don't panic. The tire won't go flat instantly; you've got plenty of time.
- Inspect the old core. Look at the rubber seal at the tip. Cracked? Flattened? Hard as a rock? That's your leak. Sometimes you'll see green corrosion powder — that's the brass reacting with moisture and road salt.
- Thread the new core in by hand. Start it straight. Two or three turns finger-tight.
- Snug with the tool. Give it maybe an eighth to a quarter turn past finger-tight. You're compressing that rubber seal against the brass seat. Too loose and it leaks. Too tight and you crush the seal or strip the stem's soft brass threads. Feel for a firm stop, like tightening a jar lid until it just seats.
- Recheck pressure. Air escaped during the swap. Add air to the door-jamb spec (usually 32 to 35 PSI for sedans, 35 to 40 for SUVs). Replace the plastic cap — it keeps dirt and water off the core's pin.
- Soap-test again. Spray the tip. No bubbles means you're done.
DIY Video Guide
The video below isn't a valve-core demo — it's a hands-on walkthrough of the other most common driveway flat-tire fix: plugging a nail hole with a tire plug kit. Same neighborhood, different repair. It's worth watching because the first half shows the part that matters for you too — jacking the car safely, finding the leak, and working around the valve area without damaging the stem. If your soap test points at the tread instead of the valve tip, this is the fix you'll want next.When to call us
DIY is great, but some jobs need a pro. If the problem persists, you spot anything dangerous, or you'd rather have an expert handle it, call (786) 551-9398 — Flat Tire Miami serves Miami-Dade County (Mon-Fri 5PM-7AM, Sat-Sun 24H). No pressure, no upsells.